How to Detect Radon: What You Should Know
Detecting radon in your home is simpler than you might think. The best way to detect radon is by using a short-term or long-term radon test kit. These kits are widely available and easy to use, providing crucial information about radon levels in your living space.
Radon is a colorless, odorless radioactive gas. It can seep into homes from the ground. Because it’s undetectable by your senses, testing is the only sure way to know if you have a problem. Many homes have radon, and it’s important to check yours.
- Radon is a silent threat.
- Testing is the only way to detect it.
- Test kits are easy to find and use.
- Radon can affect any home.
Ready to learn how to put these tests to work in your home? Below, we’ll walk you through the simple steps for detecting radon and what you need to know about the results.
Your Guide to Detecting Radon in Your Home
You’ve learned that radon is a silent invader, and testing is key. But where do you begin? This section will guide you through the practical steps of radon detection. You’ll discover the different types of tests available and how to choose the one that’s right for your situation.
Understanding Radon Test Kits: Your First Line of Defense
The good news is that detecting radon isn’t complicated. You don’t need a scientist or a fancy degree. You just need the right tool and a little bit of know-how. Radon test kits are designed for everyday homeowners. They’ve made it simple to get accurate results right in your own home.
Short-Term Radon Tests: A Quick Snapshot
Think of a short-term test like a quick check-up for your home’s radon levels. These tests typically run for 2 to 7 days. They give you an idea of the radon concentration over a short period. This can be useful for a quick assessment, but it might not reflect the full picture.
Why are they called “short-term”? Because they’re designed to give you results relatively fast. You place the device in a central living area, close up the house, and let it do its work. Then, you send it off or read it yourself.
We found that short-term tests are often used when someone is buying or selling a home. They provide a rapid snapshot. However, radon levels can fluctuate. Things like weather changes can impact the readings. So, a short-term test might not be the most precise indicator over time.
Long-Term Radon Tests: The More Definitive Measure
For a more accurate understanding of your home’s radon exposure, a long-term test is usually recommended. These tests are designed to be in place for at least 90 days, and often for a year or more. They capture the radon levels across different seasons and conditions.
Why is longer better? Radon gas levels can change. They can be higher in the winter when windows are closed and basements are sealed. They might be lower in the summer. A long-term test averages out these fluctuations. This gives you a much more reliable average radon level (EPA).
We found that many health organizations suggest using long-term tests for the most accurate assessment. They provide a clearer picture of your year-round exposure. This is especially important when deciding if mitigation is needed.
Choosing the Right Test for You
So, which test should you pick? It depends on your situation and what you want to know.
If you need a quick answer, perhaps before a real estate transaction, a short-term test can be a starting point. Just remember its limitations.
If you’re looking for the most reliable data about your home’s radon situation, especially for peace of mind or making long-term decisions, a long-term test is your best bet. Many homeowners choose to do both: a short-term test followed by a long-term one for confirmation.
How to Perform a Radon Test: Step-by-Step
Using a radon test kit is designed to be straightforward. You don’t need special tools or training. Let’s walk through the general process. Always follow the specific instructions that come with your chosen test kit.
Step 1: Select Your Testing Location
Where you place the test is important for getting accurate results. The general rule is to test in the lowest lived-in level of your home. This is usually the basement, even if it’s unfinished. If you spend significant time in a specific room on a lower level (like a finished basement or a family room), you might test there.
Avoid testing in kitchens or bathrooms. These rooms have a lot of air movement from fans and open doors. Also, don’t test near drafts, windows, doors, or heating and cooling vents. You want to measure the radon concentration in the air you and your family breathe most often.
Step 2: Prepare Your Home for Testing
This is a critical step, especially for short-term tests. You need to keep your home “closed” during the testing period. This means keeping all windows and doors closed as much as possible. You can open them for brief periods to allow entry and exit. However, try to maintain normal living conditions otherwise.
During the test, continue to operate your home’s heating and cooling systems as you normally would. If you have a whole-house fan, turn it off during the test. This “closed-house” condition is essential for accurate readings, as it represents the worst-case scenario for radon buildup.
Step 3: Place and Start the Test
Carefully unpack your radon test kit. Follow the manufacturer’s instructions for activating the device. Some tests might involve removing a cap or seal. Others might require you to start a timer.
Place the test device in the chosen location. Make sure it’s on a level surface, away from direct sunlight or drafts. Keep it out of reach of children and pets. Once placed and activated, the timer starts.
Step 4: Let the Test Run Its Course
Now, you wait. For a short-term test, this is typically 2 to 7 days. For a long-term test, it’s 90 days or more. Resist the urge to move the test or open windows excessively. Patience here ensures you get reliable data.
Remember that consistent “closed-house” conditions are important throughout the entire testing period. This applies to both short and long-term tests, though the impact of opening windows is more pronounced with shorter tests.
Step 5: Collect and Send Your Results
Once the testing period is complete, it’s time to get your results. If you have a test that needs to be sent to a lab, carefully package it up. Be sure to include any required forms or payment information. Mail it promptly.
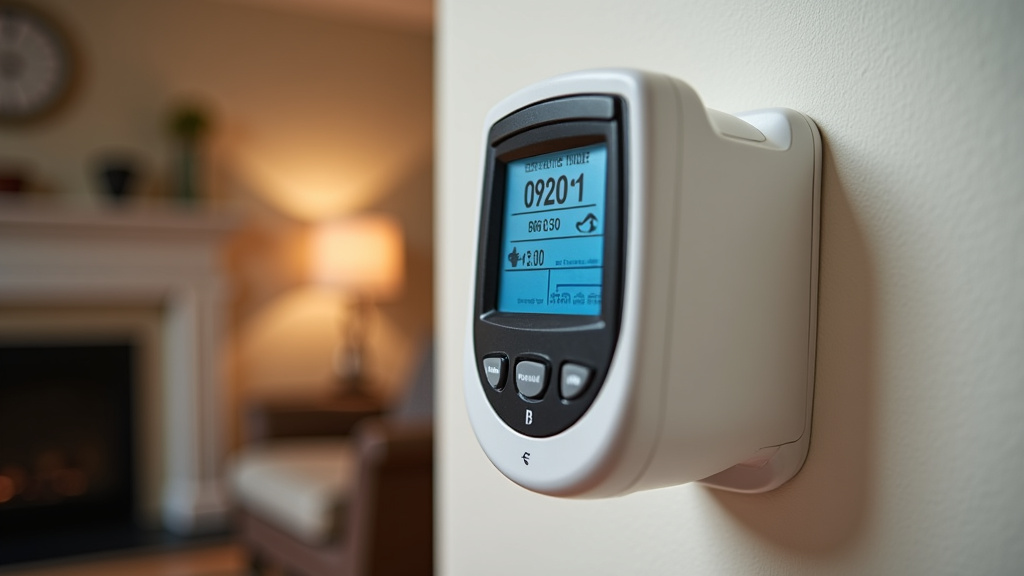
Some newer test kits offer digital readouts. You might be able to see your results right away or within a few days. If you’re sending a test to a lab, you’ll receive a report via mail or email. This report will state the radon concentration found in your home.
What Do Your Radon Test Results Mean?
Receiving your radon test results can bring a mix of anticipation and maybe a little anxiety. What do the numbers actually mean for your home and your family? Understanding the benchmarks is key to knowing your next steps.
Understanding Radon Units: Becquerels and Picocuries
Radon levels are measured in units. The most common units you’ll see are picocuries per liter of air (pCi/L) in the United States. In other countries, you might see becquerels per cubic meter (Bq/m³).
These units represent the amount of radon decay occurring in a specific volume of air. A higher number means more radon is present in your home.
Action Levels: When to Consider Mitigation
So, what’s considered a “safe” level? The Environmental Protection Agency (EPA) has established action levels for radon. These are guidelines to help you decide if you should take steps to reduce radon in your home.
The EPA recommends taking action if your radon test results are 4 pCi/L or higher. This is considered the level at which the risk of lung cancer from radon exposure becomes significant (EPA).
Even levels between 2 and 4 pCi/L are a concern. Many experts suggest considering mitigation if your home’s radon level falls within this range. This is because there is no known safe level of radon exposure. The lower you can get it, the better.
Here’s a simple breakdown of action levels:
| Radon Level (pCi/L) | Recommendation |
|---|---|
| Below 2.0 | No immediate action needed. Retest every 2-3 years. |
| 2.0 to 4.0 | Consider mitigation. Levels are higher than desirable. |
| 4.0 and above | Take action! Mitigation is strongly recommended. |
We found that many homeowners feel more comfortable aiming for levels below 2 pCi/L if possible. It’s about reducing risk as much as you can.
What If Your Results Are High?
If your test results are 4 pCi/L or higher, don’t panic. A high radon level doesn’t mean your home is immediately dangerous. It means you should take steps to reduce it. The good news is that radon mitigation systems are very effective.
The next step is to contact a qualified radon mitigation professional. They can assess your home and design a system to lower the radon levels. These systems typically work by drawing radon from beneath your home and venting it outside.
It’s important to hire a certified professional. They have the training and equipment to ensure the system is installed correctly and works efficiently. Proper installation is key to long-term radon reduction.
Tips for Effective Radon Testing
To make sure you get the most out of your radon testing efforts, keep these handy tips in mind. They’ll help ensure your results are as accurate as possible.
- Always follow the specific instructions that come with your test kit.
- Test in the lowest lived-in level of your home.
- Keep windows and doors closed as much as possible during testing.
- Do not move or disturb the test device during the testing period.
- If you get a high result, consider a follow-up test or contact a professional.
Taking these simple steps helps ensure you get reliable data about your home’s radon levels. This knowledge is power when it comes to protecting your family’s health.
Conclusion
You’ve learned how straightforward radon detection can be with the right tools. Testing your home with short-term or long-term kits is your most reliable way to understand your exposure to this invisible gas. Remember, radon affects all homes, and knowledge is your best defense. If your results indicate elevated levels, don’t delay – taking action is a critical step toward protecting your family’s health. Your next step is simple: get a radon test kit today and gain peace of mind.
Frequently Asked Questions
Can I use a DIY radon test kit, or do I need a professional?
For most homeowners, a DIY radon test kit is perfectly suitable. These kits are designed for easy use and provide accurate results when instructions are followed carefully. Professionals are typically needed for radon mitigation (fixing high levels), not for initial testing.
Where is the best place to put a radon test kit in my home?
You should place the radon test kit on the lowest lived-in level of your home, usually the basement. If you spend a lot of time in a particular room on a lower floor, like a finished basement, testing there is also recommended. Avoid kitchens and bathrooms due to airflow fluctuations.
How long does it take to get radon test results?
Short-term radon tests typically provide results within a week, including shipping time to a lab. Long-term tests need to stay in place for at least 90 days to capture a more accurate yearly average, and you’ll receive results after that period.
What does it mean if my radon test shows levels between 2.0 and 4.0 pCi/L?
If your radon test results fall between 2.0 and 4.0 picocuries per liter (pCi/L), it’s a good idea to consider mitigation. While not the highest action level, these levels still pose a health risk. Reducing them is recommended for greater safety.
How often should I retest my home for radon?
If your initial radon test shows levels below 2.0 pCi/L, it’s wise to retest every 2 to 3 years to ensure levels haven’t changed. If you’ve had radon mitigation installed, follow the professional’s recommendation for retesting frequency.